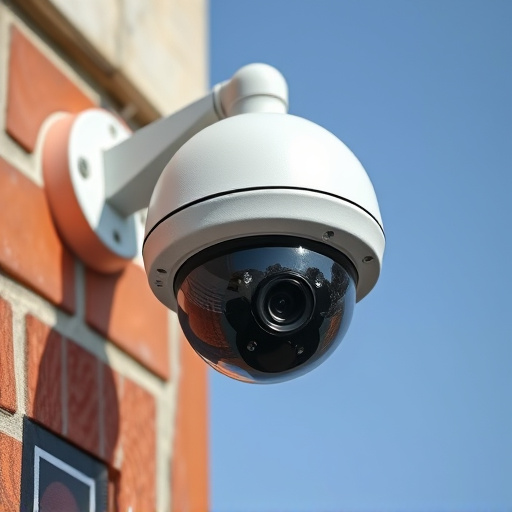
The Dummy Camera Red Blinking Light serves as a security deterrent with distinct indoor and outdoor models catering to diverse environments. Outdoor cameras are weatherproof, durable against harsh conditions, while indoor cameras offer solid construction for dust and moisture resistance without robust weatherproofing. Optimal placement maximises line-of-sight in both settings, considering lighting, foot traffic, and clear visibility. Installation involves securing cameras at eye level indoors or choosing strategic outdoor placements with weatherproof housing. Regular maintenance, including power checks, battery replacements, and lens cleaning, ensures optimal performance for indoor and outdoor surveillance.
“Transform your property’s security with the strategic installation of dummy camera red blinking light systems. This comprehensive guide explores the intricacies of this innovative home protection tool, from understanding its basic functions to selecting the perfect placement for maximum impact.
Delve into the difference between indoor and outdoor models, considering durability and environmental factors crucial for long-term effectiveness. Learn a step-by-step installation process ensuring seamless integration, and discover maintenance tips to keep your dummy camera operating as intended.”
- Understanding Dummy Camera Red Blinking Light: A Basic Guide
- Indoor vs Outdoor Dummy Cameras: Durability and Environmental Considerations
- Choosing the Right Location: Placement Strategies for Optimal Effectiveness
- Installation Process: Step-by-Step Instructions for Seamless Setup
- Maintenance and Troubleshooting: Ensuring Your Dummy Camera Continues to Protect Your Property
Understanding Dummy Camera Red Blinking Light: A Basic Guide
The Dummy Camera Red Blinking Light is a versatile security tool, designed to mimic the appearance of an active camera. This feature can act as a powerful deterrent for potential intruders, offering peace of mind both indoors and outdoors. The light’s distinct red blinking pattern is easily recognizable, signaling that your property is under surveillance.
When considering indoor versus outdoor durability, these dummy cameras are built to withstand varying environments. Outdoor models often feature weatherproof housing to protect against harsh elements, ensuring longevity despite exposure to rain, snow, or extreme temperatures. In contrast, indoor cameras typically require less robust construction but still provide reliable performance and a clear view, making them ideal for monitoring internal spaces without the need for weather resistance.
Indoor vs Outdoor Dummy Cameras: Durability and Environmental Considerations
When choosing between an indoor and outdoor dummy camera, durability and environmental considerations are paramount. Indoor cameras often face different challenges compared to their outdoor counterparts. While they may not endure direct sunlight, extreme temperatures, or rain, they must still be able to withstand dust, accidental bumps, and occasional moisture exposure within a home environment. As a result, indoor dummy cameras typically feature solid construction with a focus on aesthetics rather than robust weatherproofing.
In contrast, outdoor dummy cameras are designed to be more durable and resilient. They often boast enhanced weather resistance ratings, ensuring they can withstand various environmental conditions. These include protective coatings, sealed enclosures, and specialized lenses capable of performing well in direct sunlight and adverse weather. This durability makes outdoor cameras suitable for long-term placement outside, offering a clear view and reliable security monitoring under any circumstances.
Choosing the Right Location: Placement Strategies for Optimal Effectiveness
When selecting a location for your dummy camera red blinking light installation, consider the balance between indoor and outdoor spaces. While both have their merits, each presents unique challenges and opportunities in terms of durability and effectiveness. Outdoor installations benefit from natural light exposure, making it easier to capture various weather conditions and ambient scenarios. However, these setups require robust materials capable of withstanding extreme temperatures, moisture, and potential vandalism. Indoor locations offer more control over lighting and environmental factors but may limit the camera’s ability to adapt to dynamic outdoor environments. Choosing a strategic spot near windows or doors can enhance the installation’s visibility during specific times of day while ensuring some protection from direct elements.
Optimal placement strategies focus on maximizing both line-of-sight and practical considerations. Positioning the dummy camera in areas with high foot traffic, such as entrances or corridors, increases its effectiveness as a deterrent. Clear visibility ensures that potential intruders are detected promptly. Additionally, consider the camera’s angle and field of view to ensure it covers critical zones without overlapping or missing crucial areas. Proper placement should also account for power sources and data connectivity, ensuring easy access for maintenance while maintaining the installation’s overall aesthetic appeal.
Installation Process: Step-by-Step Instructions for Seamless Setup
The installation process for a dummy camera with a red blinking light starts by choosing the ideal location—whether indoors or outdoors. For indoor setups, secure the camera on a wall or tripod, ensuring it’s at eye level to capture clear footage. Outdoors, consider weatherproof housing and placement where it can monitor entry points or areas of interest without obstructing views.
Next, connect the camera to a power source; many models use standard USB or power adapter cables. Configure settings using the accompanying software, personalizing alert preferences, sensitivity levels, and scheduling. Testing is crucial; ensure the red light blinks as intended when triggered, indicating successful setup for both indoor and outdoor dummy camera installations.
Maintenance and Troubleshooting: Ensuring Your Dummy Camera Continues to Protect Your Property
The dummy camera’s red blinking light is a reassuring indicator of its active surveillance, but what happens when it stops working? Regular maintenance and troubleshooting are key to keeping your security system functional, regardless of whether you’ve installed an indoor or outdoor dummy camera. Start by checking the power source; ensure the camera is plugged in and the power adapter is secure. A dead battery could be causing the light to blink erratically or not at all. Replace the batteries if necessary, making sure to use high-quality batteries suitable for continuous surveillance.
Inspect the wiring connections next, tightening any loose cables that might disrupt the camera’s functionality. If you’ve installed an outdoor dummy camera, consider environmental factors such as extreme temperatures or moisture, which could impact performance. Cleaning the lens and ensuring clear visibility is also crucial for optimal operation. Regular maintenance, including these simple troubleshooting steps, will help extend the lifespan of your dummy camera, ensuring it continues to protect your property effectively, both indoors and out.
The installation of a dummy camera with its distinctive red blinking light is a simple yet effective way to enhance home security. By understanding the various aspects, from choosing the right location to maintenance tips, you can ensure your dummy camera stands the test of time, whether it’s an indoor or outdoor setup. Remember, while these cameras offer a visual deterrent, proper placement and regular care are key to maximizing their effectiveness as part of your property protection strategy.